CentOSを利用してストリーミングサーバを構築しました。
プロトコルはHLSとなります。
最終的にはFFMPEGと連携させてマルチビットレート環境としたいのですが、ここではRTMPでソースデータを受け取ったら、そのままHLSとしてストリーミングするようにしてみます。
使用する各ミドルウェアのバージョンは以下の通りです。
- CentOS7.6
- nginx 1.19.2
- nginx-rtmp-module 1.2.1
1.NginxのRTMP、HLSモジュール導入
導入するモジュールはこちらになります。
https://github.com/arut/nginx-rtmp-module
以下のようにsrcディレクトリに移動して、wgetでtar.gzファイルをダウンロード。そしてファイルを解凍します。
|
|
$ cd /usr/local/src
$ wget https://github.com/arut/nginx-rtmp-module/archive/v1.2.1.tar.gz $ tar zxvf v1.2.1.tar.gz |
とりあえず、解凍した状態で次に進みます。
2.nginxの実行ユーザを作成する
nginxというユーザを作成しておきます。
|
|
$ groupadd -g 500 nginx
$ useradd -g nginx -u 500 -s /sbin/nologin -d /var/www nginx |
3.nginxソースからインストール
公式サイト、https://nginx.org/en/を確認します。
下記の手順によりソースファイルを取得して解凍します。
そしてソースディレクトリに移動。
|
|
$ cd /usr/local/src
$ wget http://nginx.org/download/nginx-1.19.2.tar.gz $ tar zxvf nginx-1.19.2.tar.gz
$ cd nginx-1.19.2 |
必要なものをインストールしておきます
# yum install pcre-devel.x86_64 pcre2-devel.x86_64
# yum install openssl-devel.x86_64
以下のコマンドを実行してmakeまで実行します。
–add-module で、上記一番最初で解凍した RTMPモジュールを指定します。
|
|
$ ./configure --user=nginx --group=nginx --with-http_ssl_module --with-http_stub_status_module --add-module=/usr/local/src/nginx-rtmp-module-1.2.1
$ make install |
正常に実行が行われると、以下のコマンドでバージョンが表示されます。
|
|
$ /usr/local/nginx/sbin/nginx -V |
|
|
nginx version: nginx/1.19.2
built by gcc 4.8.5 20150623 (Red Hat 4.8.5-36) (GCC)
built with OpenSSL 1.0.2k-fips 26 Jan 2017
TLS SNI support enabled
configure arguments: --user=nginx --group=nginx --with-http_ssl_module --with-http_stub_status_module --add-module=/usr/local/src/nginx-rtmp-module-1.2.1 |
4.nginx起動スクリプト作成
起動スクリプトを書きます。
https://www.nginx.com/resources/wiki/start/topics/examples/redhatnginxinit/ を参考にします。
ファイルの中身は以下のようにします。
1
2
3
4
5
6
7
8
9
10
11
12
13
14
15
16
17
18
19
20
21
22
23
24
25
26
27
28
29
30
31
32
33
34
35
36
37
38
39
40
41
42
43
44
45
46
47
48
49
50
51
52
53
54
55
56
57 |
#! /bin/sh
# Author: Ryan Norbauer http://norbauerinc.com
# Modified: Geoffrey Grosenbach http://topfunky.com
# Modified: Clement NEDELCU
set -e
#PATH=/usr/local/sbin:/usr/local/bin:/sbin:/bin:/usr/sbin:/usr/bin
DESC="nginx daemon"
NAME=nginx
DAEMON=/usr/local/nginx/sbin/$NAME
SCRIPTNAME=/etc/init.d/$NAME
# デーモンファイルが見つからなければ、スクリプトを終了する
test -x $DAEMON || exit 0
d_start() {
$DAEMON || echo -n " already running"
}
d_stop() {
$DAEMON -s quit || echo -n " not running"
}
d_reload() {
$DAEMON -s reload || echo -n " could not reload"
}
case "$1" in
start)
echo -n "Starting $DESC: $NAME"
d_start
echo "."
;;
stop)
echo -n "Stopping $DESC: $NAME"
d_stop
echo "."
;;
reload)
echo -n "Reloading $DESC: configuration..."
d_reload
echo "reloaded."
;;
restart)
echo -n "Restarting $DESC: $NAME"
d_stop
# 再起動の前に2秒スリープする。Nginxデーモンが穏便に終了するための時間を与えるのである。
sleep 2
d_start
echo "."
;;
*)
echo "Usage: $SCRIPTNAME {start|stop|restart|reload}" >&2
exit 3
;;
esac
exit 0 |
また、以下のようにして起動スクリプトに実行権限を付与しておきましょう。
|
|
chmod +x /etc/init.d/nginx |
インストールディレクトリは以下のようになったはずです。
1 2
3
4
5
6
7
8
9
10
11
12
13 |
nginx path prefix: "/usr/local/nginx"
nginx binary file: "/usr/local/nginx/sbin/nginx"
nginx modules path: "/usr/local/nginx/modules"
nginx configuration prefix: "/usr/local/nginx/conf"
nginx configuration file: "/usr/local/nginx/conf/nginx.conf"
nginx pid file: "/usr/local/nginx/logs/nginx.pid"
nginx error log file: "/usr/local/nginx/logs/error.log"
nginx http access log file: "/usr/local/nginx/logs/access.log"
nginx http client request body temporary files: "client_body_temp"
nginx http proxy temporary files: "proxy_temp"
nginx http fastcgi temporary files: "fastcgi_temp"
nginx http uwsgi temporary files: "uwsgi_temp"
nginx http scgi temporary files: "scgi_temp" |
今後、サービスを起動する場合は以下のようなコマンドを実行します。
5.nginx自動起動スクリプト作成
また、OSが再起動するたびに自動起動させるには、viで以下のファイルを編集します
|
|
vi /lib/systemd/system/nginx.service |
1
2
3
4
5
6
7
8
9
10
11
12
13
14
15 |
[Unit]
Description=The NGINX HTTP and reverse proxy server
After=syslog.target network.target remote-fs.target nss-lookup.target
[Service]
Type=forking
PIDFile=/usr/local/nginx/logs/nginx.pid
ExecStartPre=/usr/local/nginx/sbin/nginx -t
ExecStart=/usr/local/nginx/sbin/nginx
ExecReload=/usr/local/nginx/sbin/nginx -s reload
ExecStop=/bin/kill -s QUIT $MAINPID
PrivateTmp=true
[Install]
WantedBy=multi-user.target |
自動起動のコマンドは以下のようにします。
|
|
# nginx起動
systemctl start nginx
# 起動出来てるか確認
systemctl status nginx
# 自動起動設定ON
systemctl enable nginx |
6.NGINXの設定変更(nginx.conf)
nginx.confは、/usr/local/nginx/confの中にあります。
以下のような設定になります。 なお、ディレクティブの説明は以下のURLを参照。
https://nginx.org/en/docs/http/ngx_http_core_module.html
以下の設定により、live1にRTMPでストリームを流すと、hlsに m3u8ファイルが作成されます。
1
2
3
4
5
6
7
8
9
10
11
12
13
14
15
16
17
18
19
20
21
22
23
24
25
26
27
28
29
30
31
32
33
34
35
36
37
38
39
40
41
42
43
44
45
46
47
48
49
50
51
52
53
54
55
56
57
58
59
60
61
62
63
64
65
66
67
68
69
70
71
72
73
74
75
76
77
78 |
#user nobody;
worker_processes auto;
#error_log logs/error.log;
#error_log logs/error.log notice;
error_log logs/error.log info;
#pid logs/nginx.pid;
events {
worker_connections 1024;
}
rtmp_auto_push on; rtmp {
server {
listen 1935;
access_log logs/rtmp_access.log ; chunk_size 4096;
application live1 {
live on;
wait_video on;
hls on;
hls_cleanup on;
hls_path /usr/local/nginx/html/hls;
#遅延対策
hls_fragment 500ms;
hls_playlist_length 1s;
hls_type live;
hls_nested on;
} }
}
http { include mime.types;
default_type application/octet-stream;
#log_format main '$remote_addr - $remote_user [$time_local] "$request" '
# '$status $body_bytes_sent "$http_referer" '
# '"$http_user_agent" "$http_x_forwarded_for"';
#access_log logs/access.log main;
sendfile on;
#tcp_nopush on;
#keepalive_timeout 0;
keepalive_timeout 65;
#gzip on;
server {
listen 80;
server_name localhost;
location /hls {
types {
application/vnd.apple.mpegurl m3u8;
}
root html;
index index.html index.htm;
}
location /dash {
types {
application/vnd.apple.mpegurl mpd; }
root html;
index index.html index.htm; }
}
} |
上記の設定では、hlsディレクトリに m3u8ファイルが作成されますので、hlsディレクトリを作成しておきます。
|
|
$ mkdir /usr/local/nginx/html/hls
$ chmod +w /usr/local/nginx/html/hls |
文法チェックは以下のように行います。
|
|
$ /usr/local/nginx/sbin/nginx -t |
文法が問題無ければ以下のように successfulと表示されます。
|
|
nginx: the configuration file /usr/local/nginx/conf/nginx.conf syntax is ok
nginx: configuration file /usr/local/nginx/conf/nginx.conf test is successful |
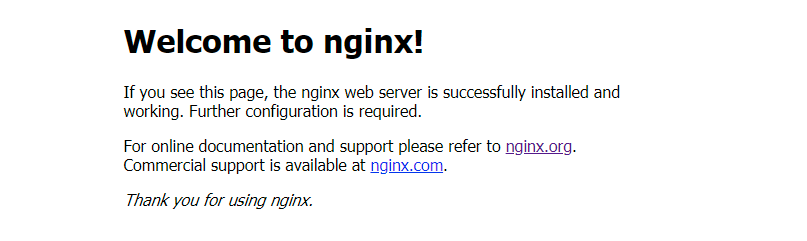
まずは通常のhtmlが表示されるのか動作確認を行います。
Webブラウザからnginxをインストールしたサーバにアクセスできるか確認してください。
以下のように表示されれば、正常動作しています。
また、以下のコマンドを実行してrtmpポート(1935)がnginxにより使用されているか確認します。
|
|
$ ss -natu | grep LISTEN | grep 1935 |
正常に使用されていれば以下のようになるはずです。
|
tcp LISTEN 0 128 *:1935 *:* |
7.ストリーミングのテスト
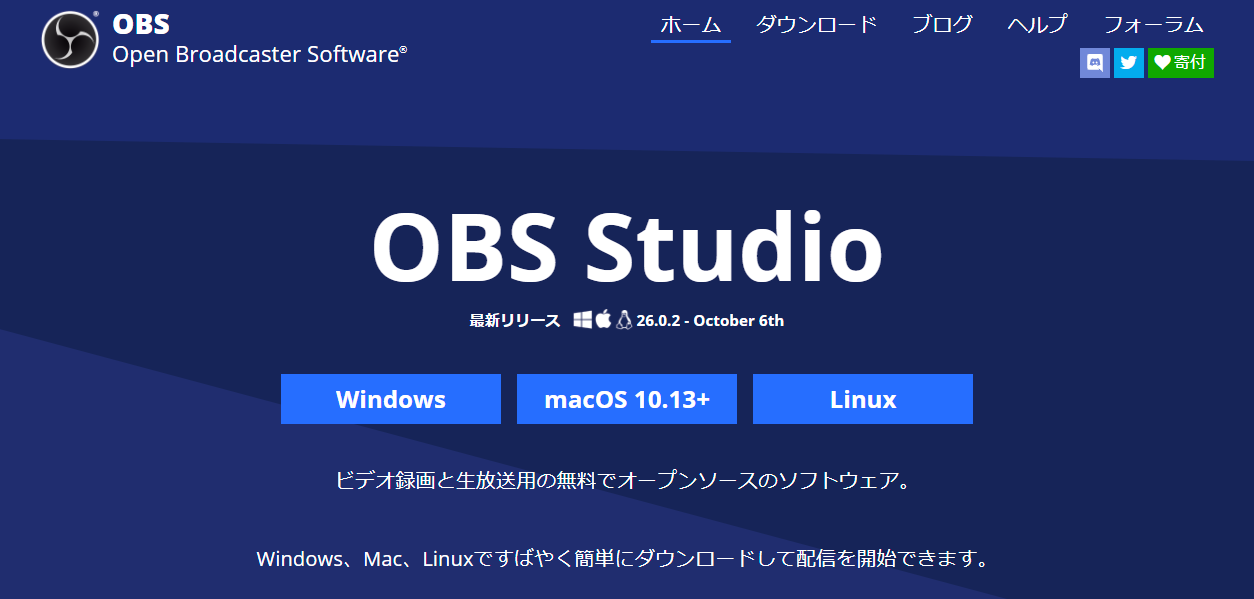
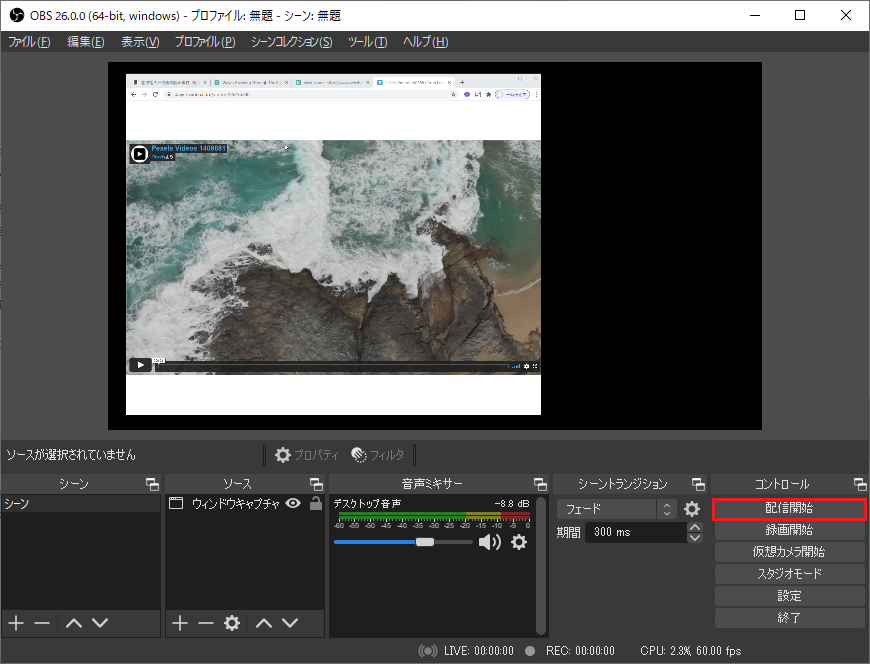
ストリーミングソフトとして有名なフリーソフトOBSをインストールします。
https://obsproject.com/ja
ダウンロードからセットアップファイルを入手しPCにインストールします。
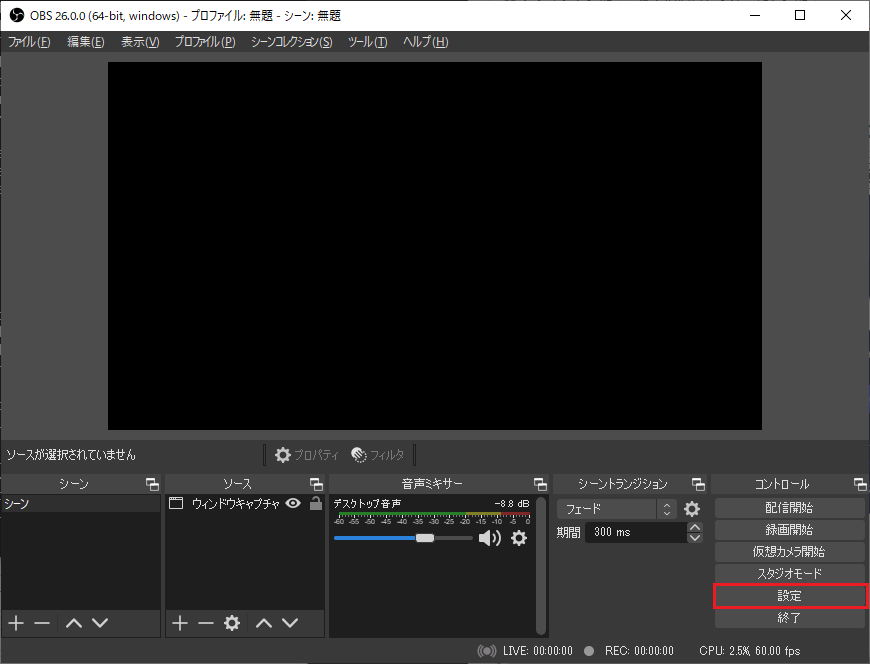
設定ボタンを押して設定画面を表示します。
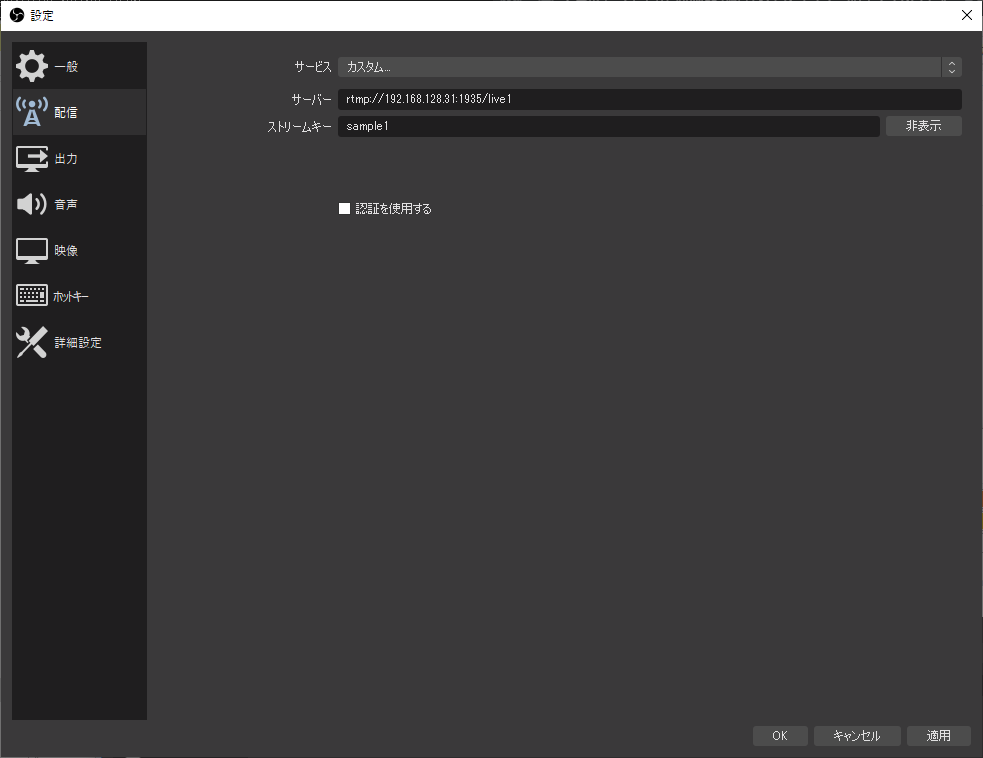
配信タブより、nginxを導入したサーバに対してサービスをカスタムに変更。
その後、サーバの下の【live1】部分は nginx.confのrtmpディレクティブの application で指定した値と同じにします。
ストリームキーはなんでも適当で大丈夫です。このストリームキーの値でサーバ側にディレクトリが作成されます。
- サーバー: rtmp://(ip address)/live1
- ストリームキー: sample1
その後、「配信開始」ボタンをクリックします。
これで実際にストリーミングがサーバに送られます。
以下のコマンドでhtml内のhlsディレクトリに移動します。
|
$ cd /usr/local/nginx/html/hls
$ ls |
lsコマンドを実行するとストリームキーでディレクトリが作成されているはずです。
さらに、sample1に移動してlsコマンドを実行すると、複数のtsファイルとindex.m3u8ファイルが確認できるはずです。
この index.m3u8ファイルを<video>タグに指定すればストリーミング再生ができます。
|
|
6.ts 7.ts 8.ts index.m3u8 |
具体的なvideoタグの書き方ですが、以下のようなHTMLを作成します。
/usr/local/nginx/html ディレクトリに設置して、ブラウザでこのHTMLを開きます。
1
2
3
4
5
6
7
8
9
10
11
12
13
14
15
16
17
18
19
20
21
22
23
24
|
<!DOCTYPE html>
<html>
<head>
<meta charset="utf-8">
<title>MediaElement</title>
<!-- MediaElement style -->
<link rel="stylesheet" href="https://cdnjs.cloudflare.com/ajax/libs/mediaelement/4.2.9/mediaelementplayer.css" />
</head>
<body>
<!-- MediaElement -->
<script src="https://cdnjs.cloudflare.com/ajax/libs/mediaelement/4.2.9/mediaelement-and-player.js"></script>
<video id="player" />
</body> <script type="text/javascript">
var player = new MediaElementPlayer('player', { success: function(mediaElement, originalNode) {
console.log("Player initialised");
} });
player.setSrc("http://192.168.128.31/hls/sample1/index.m3u8");
</script>
</html> |