Upload files to database (Servlet + JSP + MySQL)
- Servlet 3.0: Using Servlet 3.0 we can write code to handle file upload easily. For detailed explanation of how to upload file with Servlet 3.0, read the tutorial: How to write upload file servlet with Servlet 3.0 API.
- MySQL database 5.5: We will store uploaded files in MySQL database. For more details about how to store files in MySQL database, read the article: Insert file data into MySQL database using JDBC.
- Upload.jsp: presents a form which allows users entering some information (first name and last name), and picking up a file (a portrait image).
- FileUploadDBServlet: captures input from the upload form, saves the upload file into database, and forwards the users to a message page.
- Message.jsp: shows either successful or error message.
1. Creating MySQL database table
First, let’s create a database and a table in MySQL. Execute the following script using either MySQL Command Line Client or MySQL Workbench:1 2 3 4 5 6 7 8 9 10 11 | create database AppDB;use AppDB;CREATE TABLE `contacts` ( `contact_id` int(11) NOT NULL AUTO_INCREMENT, `first_name` varchar(45) DEFAULT NULL, `last_name` varchar(45) DEFAULT NULL, `photo` mediumblob, PRIMARY KEY (`contact_id`)) ENGINE=InnoDB DEFAULT CHARSET=latin1 |
2. Coding upload form page
Write code for the upload form as follows (Upload.jsp):1 2 3 4 5 6 7 8 9 10 11 12 13 14 15 16 17 18 19 20 21 22 23 24 25 26 27 28 29 30 31 32 33 34 35 36 | <%@ page language="java" contentType="text/html; charset=ISO-8859-1" pageEncoding="ISO-8859-1"%><!DOCTYPE html PUBLIC "-//W3C//DTD HTML 4.01 Transitional//EN" "http://www.w3.org/TR/html4/loose.dtd"><html><head><meta http-equiv="Content-Type" content="text/html; charset=ISO-8859-1"><title>File Upload to Database Demo</title></head><body> <center> <h1>File Upload to Database Demo</h1> <form method="post" action="uploadServlet" enctype="multipart/form-data"> <table border="0"> <tr> <td>First Name: </td> <td><input type="text" name="firstName" size="50"/></td> </tr> <tr> <td>Last Name: </td> <td><input type="text" name="lastName" size="50"/></td> </tr> <tr> <td>Portrait Photo: </td> <td><input type="file" name="photo" size="50"/></td> </tr> <tr> <td colspan="2"> <input type="submit" value="Save"> </td> </tr> </table> </form> </center></body></html> |
3. Coding file upload servlet
Create a servlet class named FileUploadDBServlet.java with the following code:1 2 3 4 5 6 7 8 9 10 11 12 13 14 15 16 17 18 19 20 21 22 23 24 25 26 27 28 29 30 31 32 33 34 35 36 37 38 39 40 41 42 43 44 45 46 47 48 49 50 51 52 53 54 55 56 57 58 59 60 61 62 63 64 65 66 67 68 69 70 71 72 73 74 75 76 77 78 79 80 81 82 83 84 85 86 87 88 89 90 | package net.codejava.upload;import java.io.IOException;import java.io.InputStream;import java.sql.Connection;import java.sql.DriverManager;import java.sql.PreparedStatement;import java.sql.SQLException;import javax.servlet.ServletException;import javax.servlet.annotation.MultipartConfig;import javax.servlet.annotation.WebServlet;import javax.servlet.http.HttpServlet;import javax.servlet.http.HttpServletRequest;import javax.servlet.http.HttpServletResponse;import javax.servlet.http.Part;@WebServlet("/uploadServlet")@MultipartConfig(maxFileSize = 16177215) // upload file's size up to 16MBpublic class FileUploadDBServlet extends HttpServlet { // database connection settings private String dbURL = "jdbc:mysql://localhost:3306/AppDB"; private String dbUser = "root"; private String dbPass = "secret"; protected void doPost(HttpServletRequest request, HttpServletResponse response) throws ServletException, IOException { // gets values of text fields String firstName = request.getParameter("firstName"); String lastName = request.getParameter("lastName"); InputStream inputStream = null; // input stream of the upload file // obtains the upload file part in this multipart request Part filePart = request.getPart("photo"); if (filePart != null) { // prints out some information for debugging System.out.println(filePart.getName()); System.out.println(filePart.getSize()); System.out.println(filePart.getContentType()); // obtains input stream of the upload file inputStream = filePart.getInputStream(); } Connection conn = null; // connection to the database String message = null; // message will be sent back to client try { // connects to the database DriverManager.registerDriver(new org.mariadb.jdbc.Driver()); conn = DriverManager.getConnection(dbURL, dbUser, dbPass); // constructs SQL statement String sql = "INSERT INTO contacts (first_name, last_name, photo) values (?, ?, ?)"; PreparedStatement statement = conn.prepareStatement(sql); statement.setString(1, firstName); statement.setString(2, lastName); if (inputStream != null) { // fetches input stream of the upload file for the blob column statement.setBlob(3, inputStream); } // sends the statement to the database server int row = statement.executeUpdate(); if (row > 0) { message = "File uploaded and saved into database"; } } catch (SQLException ex) { message = "ERROR: " + ex.getMessage(); ex.printStackTrace(); } finally { if (conn != null) { // closes the database connection try { conn.close(); } catch (SQLException ex) { ex.printStackTrace(); } } // sets the message in request scope request.setAttribute("Message", message); // forwards to the message page getServletContext().getRequestDispatcher("/Message.jsp").forward(request, response); } }} |
- @WebServlet: marks this servlet so that the servlet container will load it at startup, and map it to the URL pattern /uploadServlet.
- @MultipartConfig: indicates this servlet will handle multipart request. We restrict maximum size of the upload file up to 16 MB.
- Obtaining the part of upload file in the request: The name “photo” is name of the file input field in the Upload.jsp page.1
Part filePart = request.getPart("photo"); - Obtaining input stream of the upload file: 1
inputStream = filePart.getInputStream(); - And pass the input stream into the prepared statement:
1 | statement.setBlob(3, inputStream); |
4. Coding message page
Create a JSP page named as Message.jsp with the following code:1 2 3 4 5 6 7 8 9 10 11 12 13 14 15 | <%@ page language="java" contentType="text/html; charset=ISO-8859-1" pageEncoding="ISO-8859-1"%><!DOCTYPE html PUBLIC "-//W3C//DTD HTML 4.01 Transitional//EN" "http://www.w3.org/TR/html4/loose.dtd"><html><head><meta http-equiv="Content-Type" content="text/html; charset=ISO-8859-1"><title>Message</title></head><body> <center> <h3><%=request.getAttribute("Message")%></h3> </center></body></html> |
5. Testing the application and verifying file stored in database
Supposing the application is deployed on localhost at port 8080, under the context root /FileUploadDatabase, type the following URL:http://localhost:8080/FileUploadDatabase/Upload.jsp
The following upload form is displayed: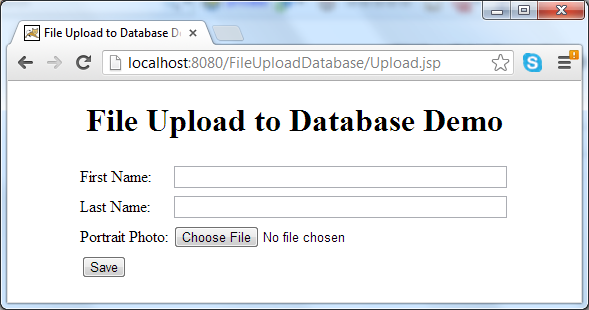 Type first name, last name, and pick up an image file. Click Save button, if everything is going well, this message appears:
 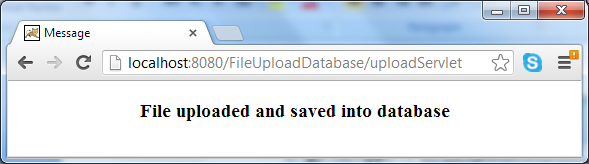 To verify that the file is stored successfully in the database, open a new SQL Editor in MySQL Workbench and execute the following query:
1 | select * from contacts; |
 A dialog appears and we can see the image in the Image tab:
 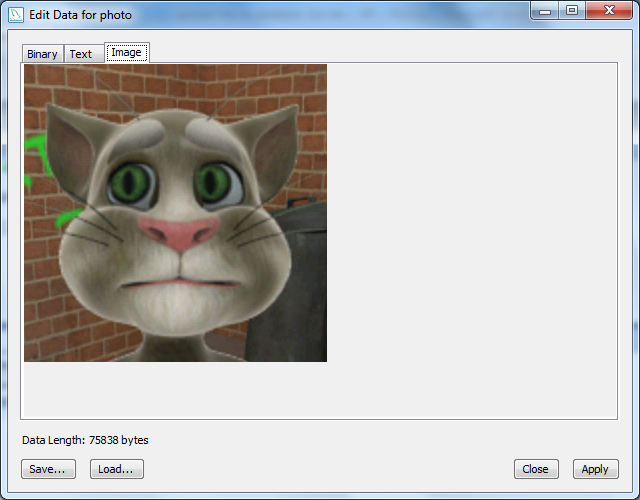 If you want to retrieve the stored file programmatically, read the tutorial: Read file data from database using JDBC. NOTE: By default, MySQL restricts the size of data packet can be sent in a query to only 1 MB. So you may get an error if trying to upload a file bigger than this limit. To increase this size limit, set the max_allowed_packet variable in MySQL, as discussed in the tutorial Insert file data into MySQL database using JDBC.
 FileUploadDatabase.zip FileUploadDatabase.zip | [Eclipse project] | 676 kB |